Uploading Operator Connect Numbers
You can upload numbers to the customer tenant either by entering the numbers directly in the interface or by importing a list of numbers. Uploaded numbers are routed through configured SIP Connections that are attached to Calling Profile templates:
| ■ | When uploading numbers to services with IP Group-based SIP Connections and a single connection is configured, the Calling Profile Template attached to the connection is used to route the uploaded number. When multiple connections have been configured for the service, you can choose the relevant connection (each connection can be attached to a different Calling Profile and the Calling Profile Template can be configured with multiple Calling Profiles). |
| ■ | When uploading numbers to services with Tenant-based SIP Connections, you can choose the relevant Calling Profile. |
| ● | The customer must configure the company size and the Countries in their Calling plan prior to uploading (see Triggering the Partnering process from Teams admin center). |
| ● | Processing time may take up to a few minutes. |
| ● | Once the numbers have been uploaded, you can notify the customer to verify in their Teams admin center that numbers have been successfully synchronized. |
| ➢ | To upload numbers: |
| 1. | In the Multitenant Navigation pane, select Operator Connect and then click the Tenants tab. |
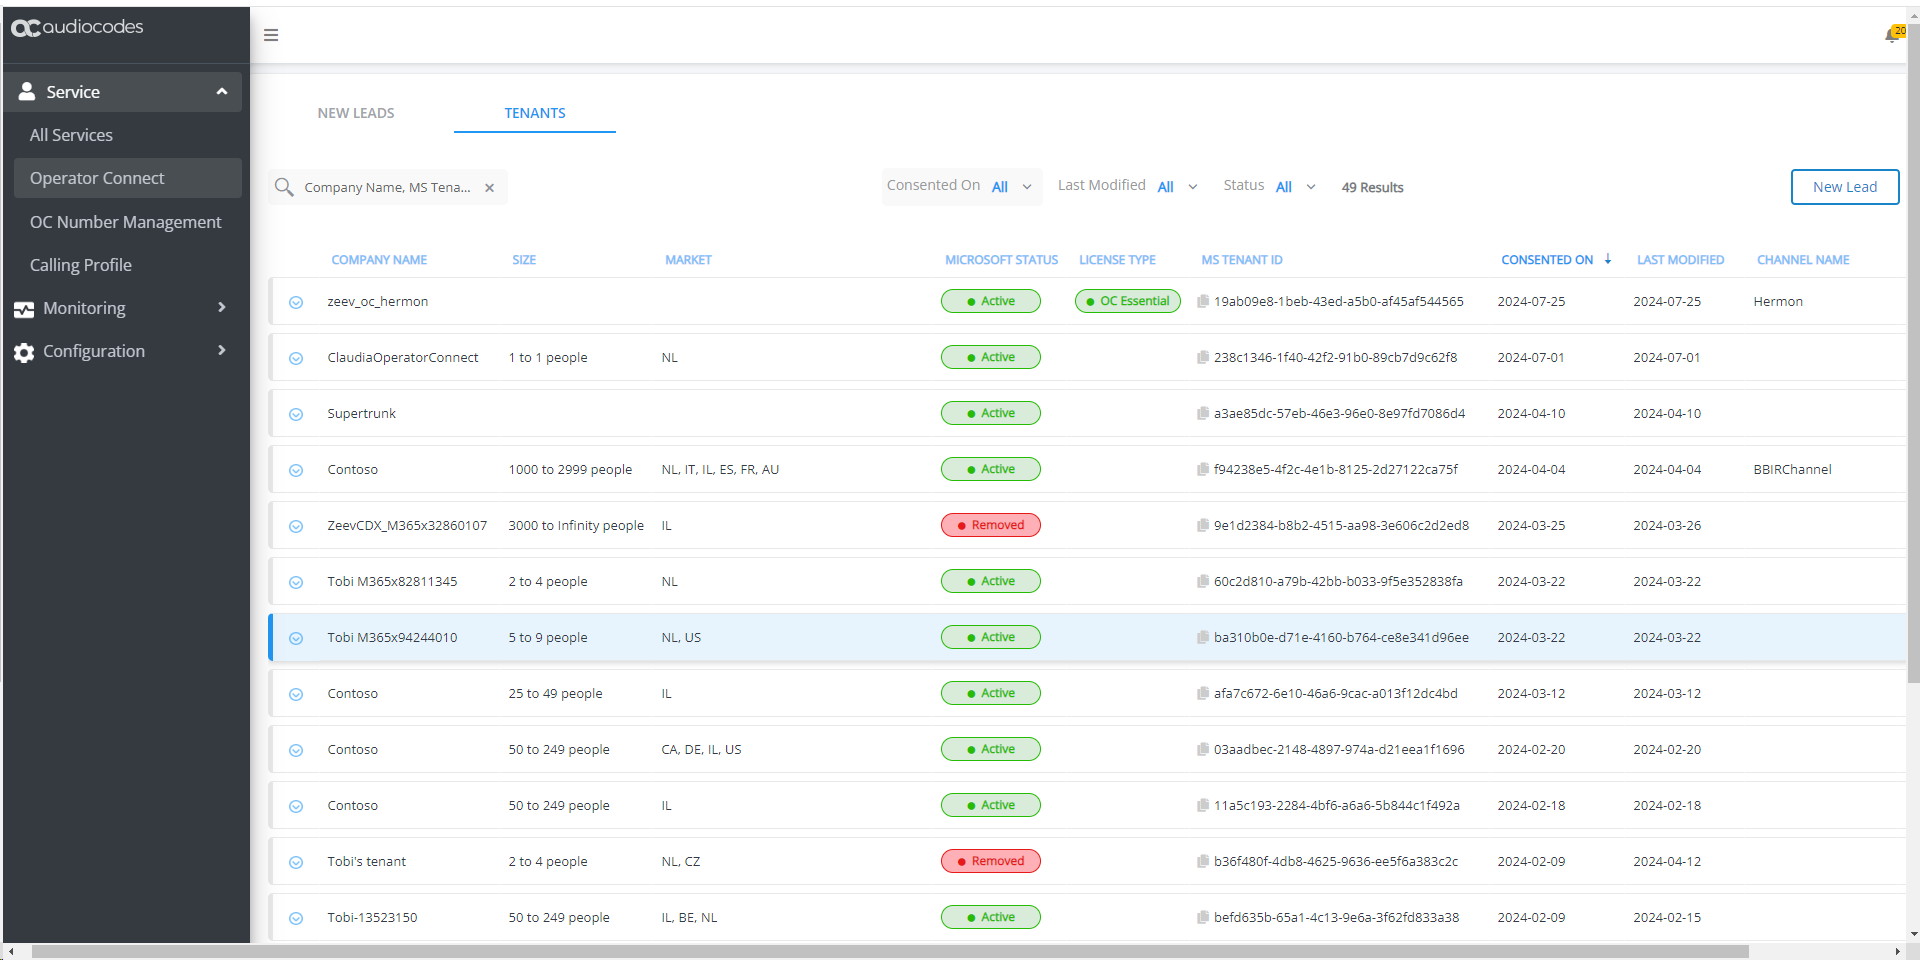
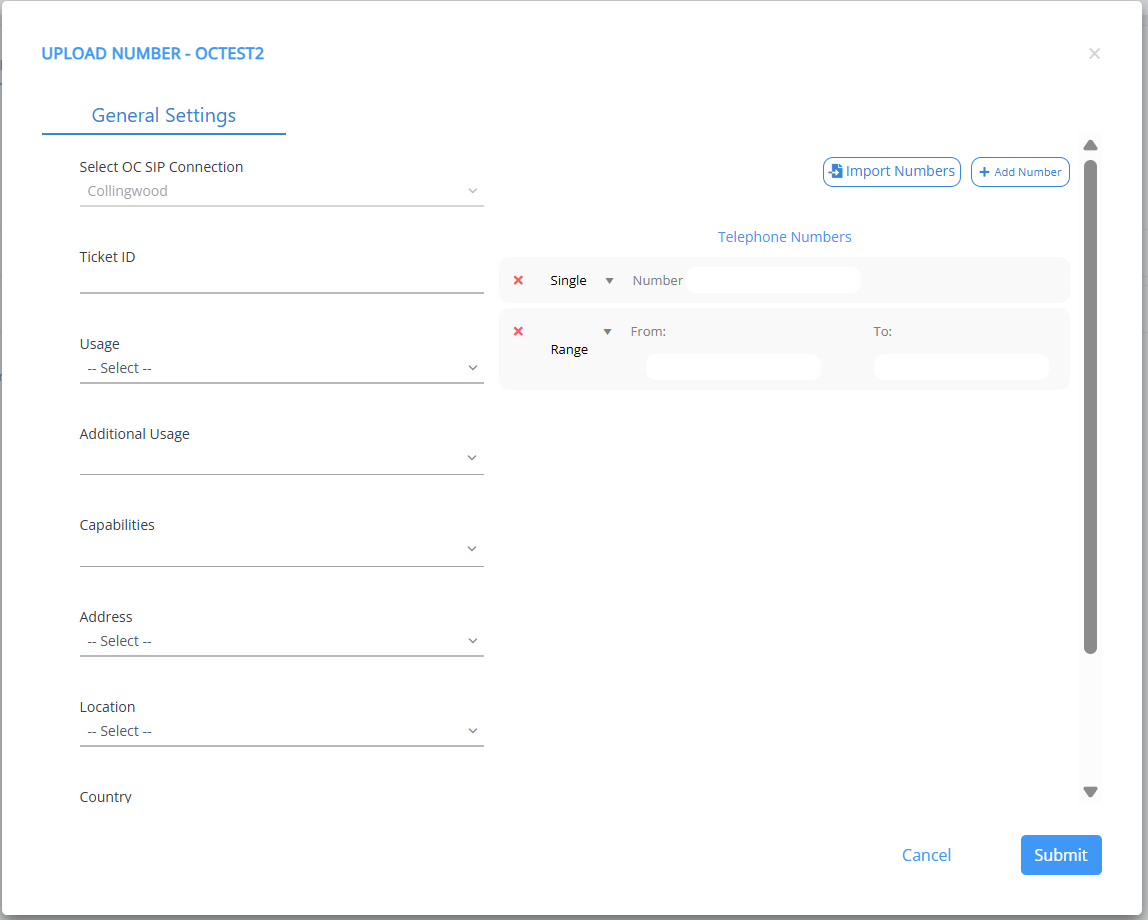
| 2. | Right-click the relevant Operator Connect tenant service, and then choose Upload Numbers; the following dialog box appears: |
Service Added with IP Group (Advanced Settings)
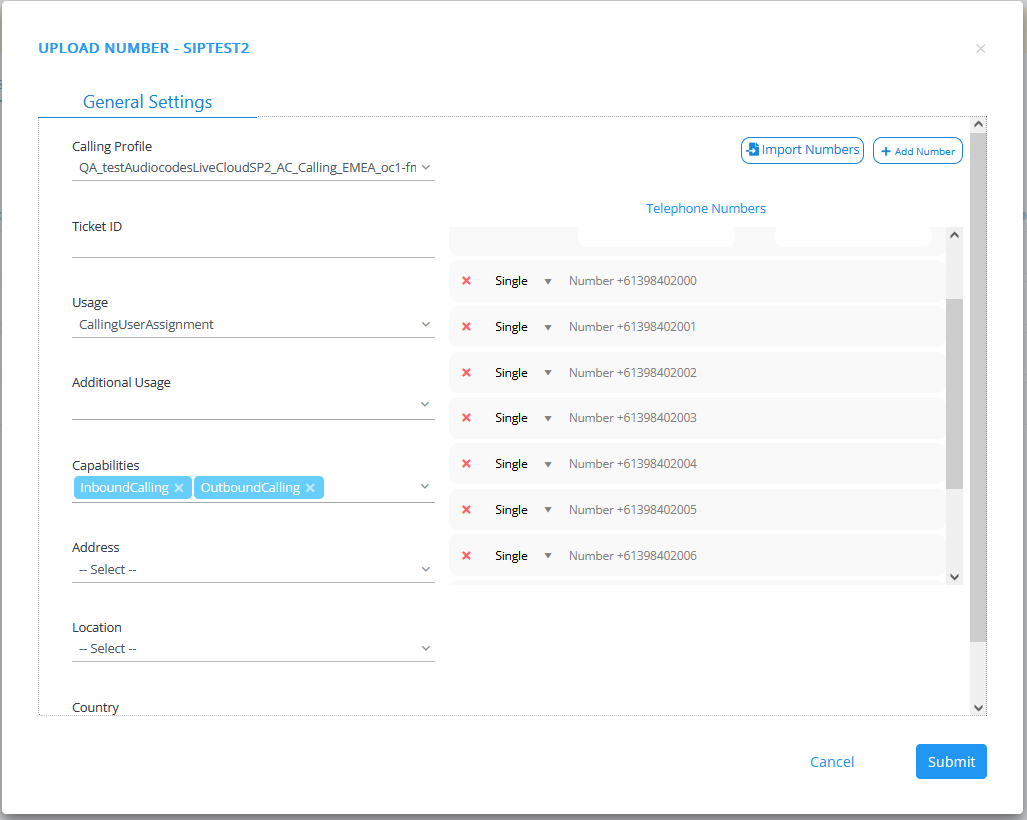
Service Added with Tenant ID

| 3. | Configure parameters according to the table below. |
General Settings
|
Parameter |
Description |
|||||||||||||||||||||||||||||||||||||||
|---|---|---|---|---|---|---|---|---|---|---|---|---|---|---|---|---|---|---|---|---|---|---|---|---|---|---|---|---|---|---|---|---|---|---|---|---|---|---|---|---|
|
Select OC SIP Connection |
Indicates the name of the OC SIP Connection. This parameter is only configurable when multiple OC SIP Connections are configured (see Provisioning Operator Connect SIP Connections), where each connection is attached to a different Calling Profile. In this case, multiple Calling Profiles are assigned to the Calling Profile Template that is attached to the OC SIP Connection. This parameter is only displayed for services with IP Group-based SIP Connections (see Create OC Essential Service with an SBC IP Group-based SIP Connection). |
|||||||||||||||||||||||||||||||||||||||
|
Calling Profiles |
From the drop-down, choose the relevant Calling Profile. The profile is applied when routing the calls of the tenant users . This parameter is only displayed for services with Tenant ID-based SIP Connections (see Create OC Essentials Service based on Tenant ID). |
|||||||||||||||||||||||||||||||||||||||
|
Calling Profiles from Assigned Templates |
Choose the Calling Profile to assign to the number. The profile is applied when routing the calls of the tenant users .
|
|||||||||||||||||||||||||||||||||||||||
|
Ticket ID |
Related Service Request ticket (see Managing Service Requests). |
|||||||||||||||||||||||||||||||||||||||
|
Usage |
From the drop-down, choose one of the following values with mapping to Teams admin center values in ():
Verify that the 'ThirdPartyAppAssignment' value is supported on your Microsoft tenant. |
|||||||||||||||||||||||||||||||||||||||
|
Additional Usage |
From the drop-down, choose an Additional usage type. For example if you configure 'CallingUserAssignment' as the Usage, then you can choose 'Conference Assignment' or 'FirstPartyAppAssignment' for the Additional Usage. Configuration of Additional usage requires workflow Version 3. |
|||||||||||||||||||||||||||||||||||||||
|
Capabilities |
From the drop-down choose one of the following values:
|
|||||||||||||||||||||||||||||||||||||||
|
Address |
Address for Emergency location (mandatory in the USA) | |||||||||||||||||||||||||||||||||||||||
|
Location |
City of Emergency location. | |||||||||||||||||||||||||||||||||||||||
|
Country |
Country prefix of the phone numbers. For example, IL-Israel. | |||||||||||||||||||||||||||||||||||||||
|
Type of Service |
Choose one of the following values:
|
|||||||||||||||||||||||||||||||||||||||
|
Phone numbers are validated according to the configuration of the customer Operator Settings on their Teams admin center. For example, if United Kingdom, France and Italy are configured then only phone numbers with Country codes for these countries can be uploaded, unless the "Geographic" option is configured above for the Type of Service. Phone number validation rules are in accordance with E.164. The E.164 format requires the following:
Local telephone number or subscriber number. It has the following structure: [+][country code][area code][subscriber number]. Example of a number with E.164 format in the United States Telephone number: 415 123 1234 E.164 format number: +14151231234
Valid country code, per civic address and/or contact info of the given lead. See Country Dialing Codes. |
||||||||||||||||||||||||||||||||||||||||
All SBC devices assigned to the profile must have identical SIP definitions and configuration. The SBC devices may be assigned different dial plans.
| 1. | In the Single number field, enter phone prefix to configure in the following format: |
+12125867001A range of numbers should be configured in the following format:
+12125867000 [5867000-5867500]| 2. | Click  to add specific numbers or a range of numbers. A new entry is added. to add specific numbers or a range of numbers. A new entry is added. |
| 3. | Click  to import an external file containing numbers. to import an external file containing numbers. |
An CSV or text file containing an imported list of numbers should be configured in the following format:
+61398402000
+61398402001
+61398402002
+61398402003
+61398402004
+61398402005
+61398402006
+61398402007
+61398402008
+61398402009
An import file can also be configured with a range of numbers:
+12125867000 [5867000-5867500]
| 4. | Click Submit to apply changes. The following dialog is displayed: |
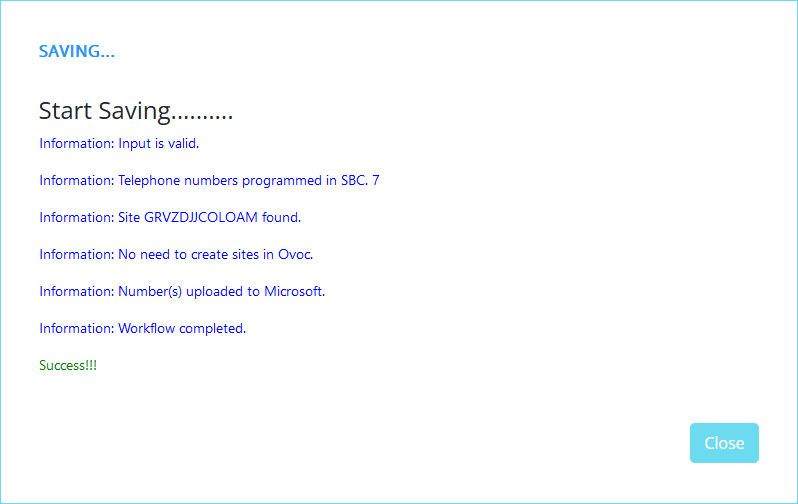
| 5. | The processing time for the Synchronization operation with the Live Platform server and Microsoft platform depends on the server load. Run the 'peering.sync-acquired-numbers-job' and 'peering.sync-upload-to-account-job' task to refresh the number data (see Synchronizing Operator Connect Jobs). |
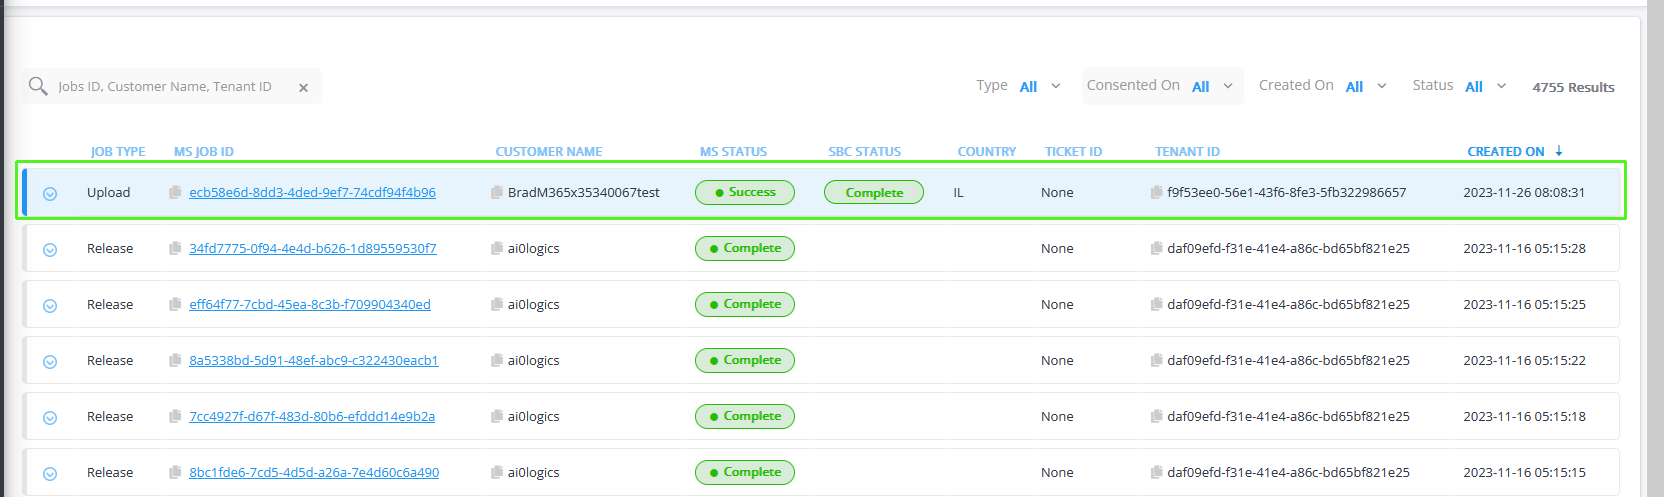
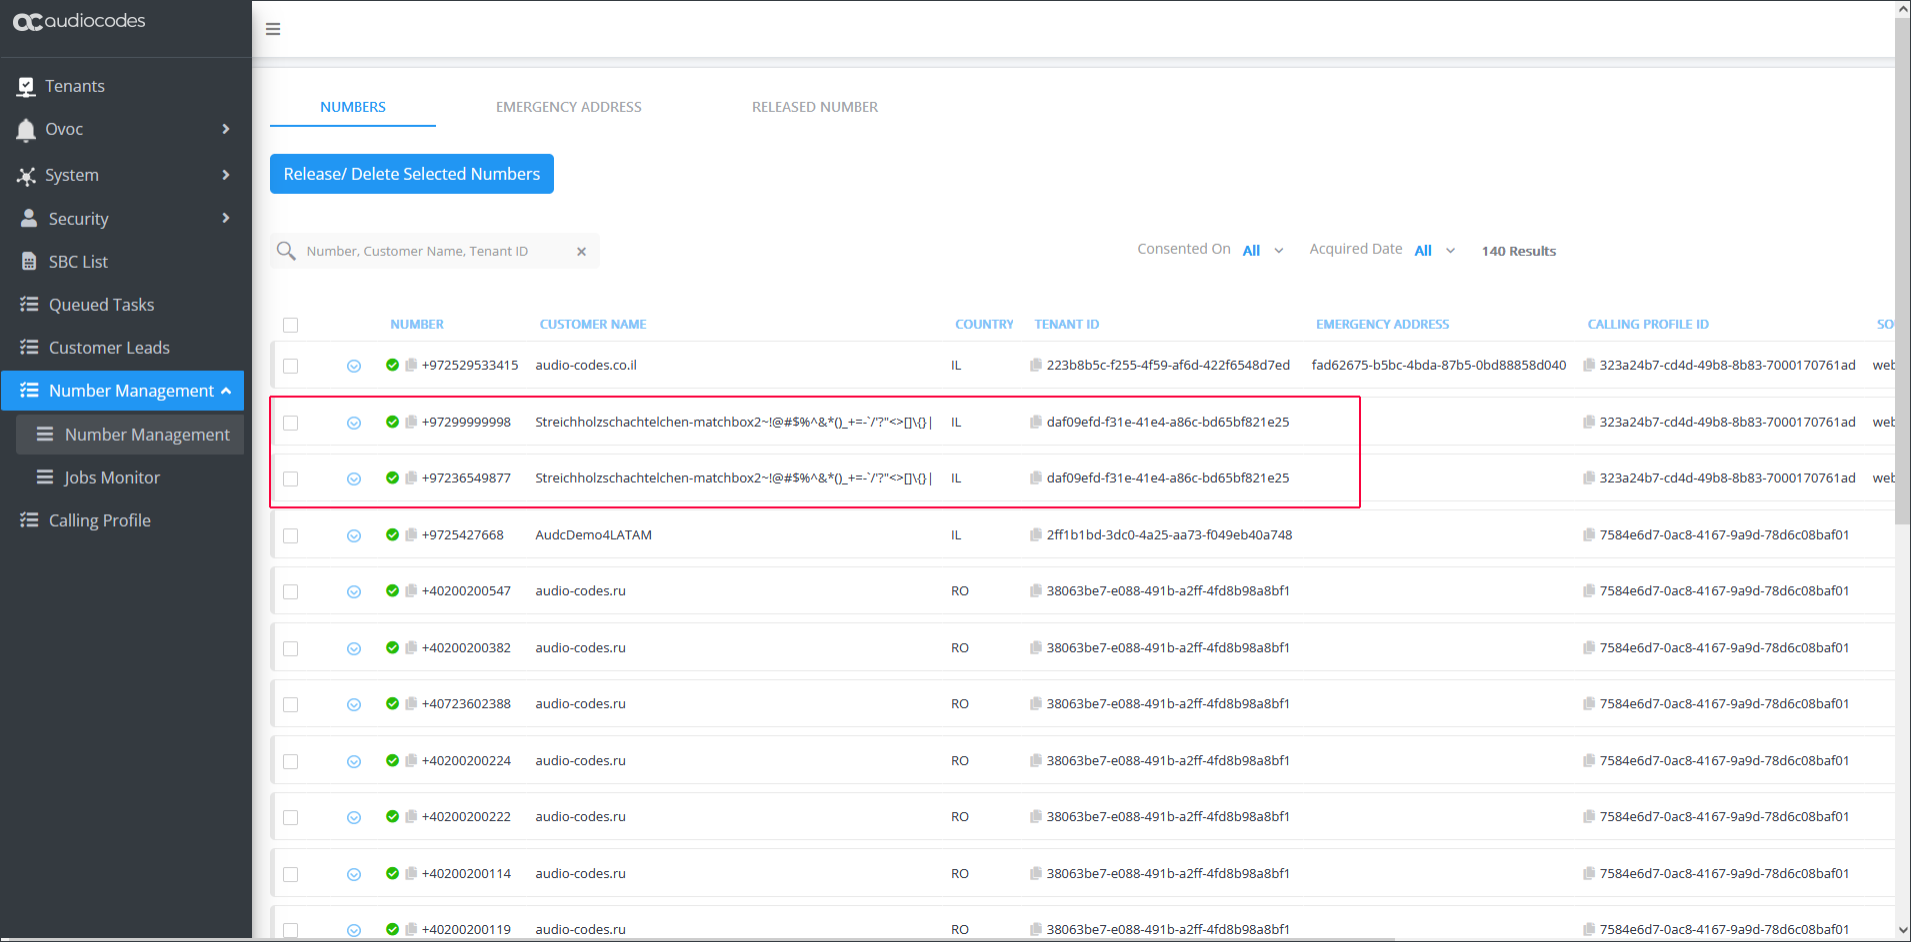
| 6. | Open the Number Management screen to view the confirmation of the successful upload: |
| ● | MS Status is Success |
| ● | SBC Status is Complete |
| 7. | In the Navigation pane, select Configuration > SBC and then click Show Prefixes. |
| 8. | Click Refresh from Sbc to synchronize the prefix list from the SBC dial plan. |
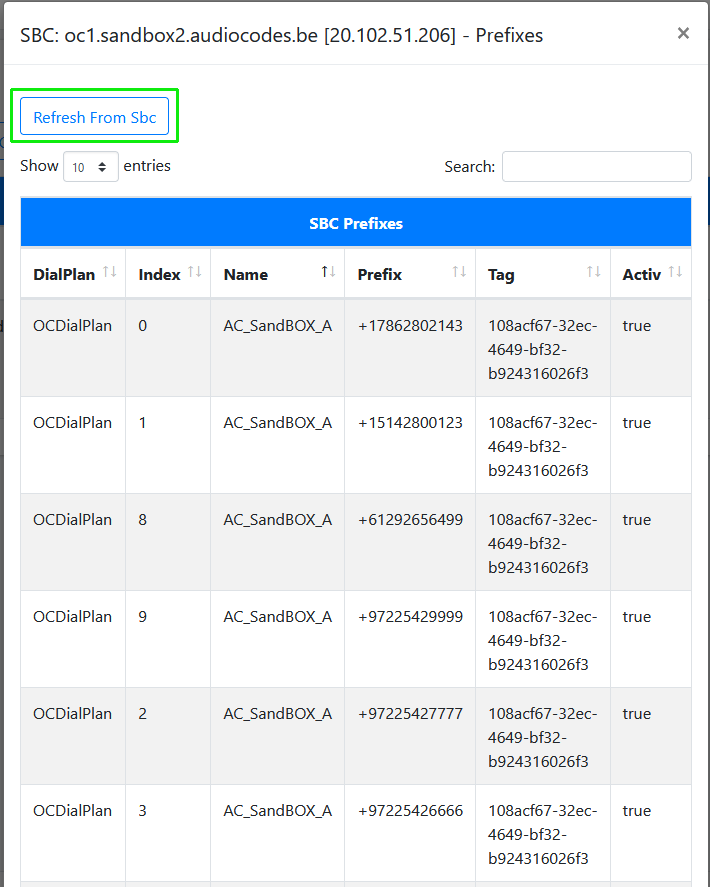
All uploaded numbers are displayed in the SBC OC Dial plan with the matching tag of the customer tenant. The corresponding numbers are displayed below in the Number Management page.
All numbers uploaded for a customer can be viewed in Show Prefixes